

A water leak inside a wall often makes its presence known in subtle ways. It might start with a musty odor you can’t seem to get rid of, a faint discolored spot on the drywall, or paint that suddenly decides to bubble or peel. These are your home's first cries for help, signaling that moisture is trapped where it shouldn't be.
The Telltale Signs of a Hidden Wall Leak
Don't mistake a hidden leak for a minor inconvenience. It's a silent destroyer, especially in a humid climate like ours here in Miami. When moisture gets stuck inside a wall cavity, it’s a race against the clock. Structural rot can set in, drywall can lose its integrity, and mold can start to grow in as little as 24 to 48 hours.
Knowing what to look for is the single most important step in protecting your home from what could become a massive repair bill. These leaks can come from anywhere—we see it all the time in Miami homes. Aging cast iron pipes can corrode from the inside out, or tiny, hard-to-spot pinhole leaks can spring up in copper supply lines. Sometimes, it’s as simple as a failing shower seal letting water seep into the wall day after day, causing slow but certain destruction.
Using Your Senses to Pinpoint a Leak
Before you reach for any tools, your best detectors are your eyes, nose, and hands. A quick, methodical check is often all it takes to confirm there’s a problem and get a good idea of where it’s coming from.
What You Can See: Scan your walls for any changes, no matter how small. Look for discoloration, which often shows up as yellowish or brownish stains on light-colored walls. Pay close attention to bubbling, peeling, or cracking paint—this is a dead giveaway that moisture is pushing the paint right off the drywall. Also, glance down at your baseboards to see if they look swollen or warped.
What You Can Smell: Never ignore a persistent musty smell. That damp, earthy odor is the classic signature of mold and mildew having a party in the dark, damp space between your walls. The smell will almost always be strongest near the source of the water.
What You Can Feel: Gently press on any areas of the wall that look suspicious. A healthy wall is firm. If you feel a soft, spongy, or even crumbly spot, that’s a clear sign the drywall has soaked up a lot of water and is starting to fail. The area might also feel unusually cool or damp to the touch.
An Expert Tip: A common mistake we see is homeowners dismissing a small stain or a faint smell as just a cosmetic issue. In reality, these are often the "tip of the iceberg," hinting at a much bigger moisture problem hiding out of sight. Acting on these early clues is the best way to keep a small leak from turning into a full-blown renovation project.
The amount of water lost from these "small" issues can be shocking. The U.S. Department of Energy estimates that hidden leaks in a home can waste up to 10,000 gallons of water every year in severe cases. That contributes to a nationwide loss of trillions of gallons. You can learn more about water efficiency on the Department of Energy's website.
Quick Reference: Early Warning Signs of a Water Leak in Your Wall
To make your initial check easier, we’ve put together this simple guide. It breaks down the common signs, where you're most likely to find them, and what could be causing them. Use this as a checklist to methodically search for and understand the signs of a water leak in your walls.
| Warning Sign | What to Look For | Common Location | Potential Cause |
|---|---|---|---|
| Discoloration | Yellow or brown stains; dark spots that indicate mold. | Ceilings below an upstairs bathroom; walls adjacent to showers. | Slow pipe drip; faulty shower pan; roof leak. |
| Texture Changes | Bubbling, peeling, or cracking paint; blistering wallpaper. | Near windows; under sinks; behind toilets. | Condensation leak; leaky supply line; failing toilet wax ring. |
| Musty Odor | A persistent earthy or damp smell that worsens over time. | Basements; laundry rooms; poorly ventilated bathrooms. | Any hidden leak creating a damp environment for mold. |
| Structural Changes | Warped baseboards; soft or spongy drywall; sagging ceilings. | Any wall containing plumbing lines; exterior walls. | Significant, long-term leak; failing drain pipe. |
Spotting one or more of these signs is a strong indicator that it's time to investigate further. A small amount of diligence now can save you a world of headaches later.
A Room-by-Room Inspection Guide
Alright, you know what to look for—the musty smells, the wall stains, the peeling paint. Now it’s time to play detective in your own home. The trick to finding a hidden wall leak isn't about random guessing; it's about being systematic. A methodical, room-by-room sweep is the best way to pinpoint the source without getting completely overwhelmed.
The smartest approach is to start where the water lives—the high-risk rooms—and work your way out from there.
This simple chart breaks down the basic sensory checks you’ll use as you move through your home. Trust your eyes, nose, and hands.
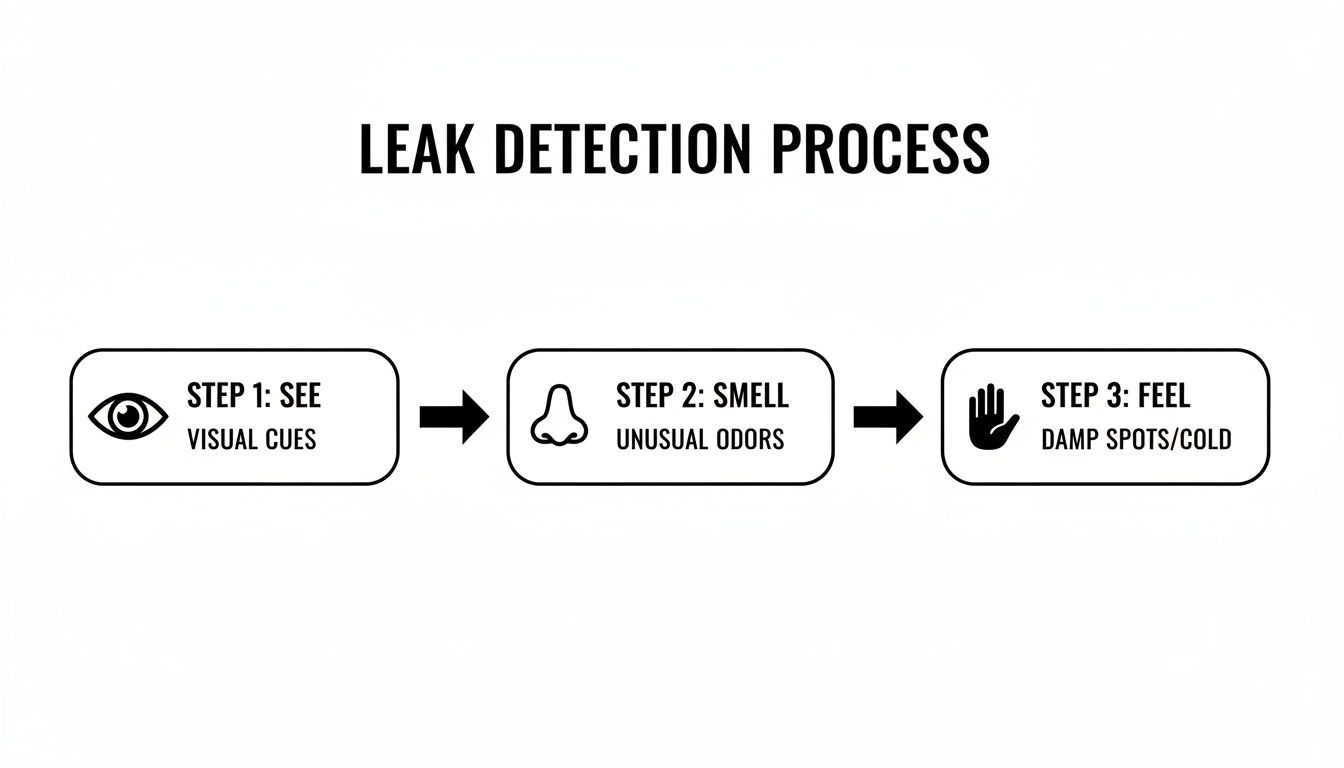
It really just boils down to using your senses to spot anything that seems out of place. As you go room by room, you're just looking for those little red flags that your sight, smell, or touch can pick up on.
Checking High-Risk Areas: Bathrooms and Kitchens
Bathrooms and kitchens are ground zero for wall leaks. They’re absolutely packed with plumbing—supply lines, drain lines, and all sorts of fixtures. It’s no wonder they’re the first place we look.
In the bathroom, start with the usual suspects:
- Tubs and Showers: Get up close and personal with the caulk and sealant. Is it cracked, peeling, or missing entirely? Gaps are an open invitation for water to sneak into your wall every single time someone showers. Gently press on the wall tiles next to your fixtures. If they feel spongy or the grout crumbles, water has likely already found its way behind them.
- Toilets: Check the wall directly behind the toilet for any soft spots or discoloration near the floor. A leaky wax ring at the toilet’s base is a classic culprit, allowing a little water to escape with every flush and soak the subfloor and drywall. Don't forget to inspect the water supply line and its shut-off valve for any slow drips.
In the kitchen, the real troublemakers are often out of sight. You’ll need to do a little digging. Pull your refrigerator away from the wall and inspect what's behind it. That little plastic water line for the ice maker is a notorious failure point. Look for active drips, old water stains, or puddles. Next, clear everything out from under your kitchen sink. Grab a flashlight and carefully check all the supply lines, the main drain pipe, and the drywall behind them for any hint of moisture.
We once had a client who was convinced a roof leak was causing a stain on their kitchen ceiling. After a methodical check, we found the real problem: a slow, steady drip from the upstairs bathroom’s shower drain. It had probably been leaking for months.
Expanding the Search to Laundry Rooms and Basements
Your laundry room has its own high-risk component: the washing machine. Those supply hoses, especially if they're the older rubber kind, can get brittle and crack under constant high pressure. Feel the wall behind the washer for any dampness and double-check that the hose connections are tight.
Basements and utility closets are where your home’s plumbing arteries run. Visually inspect any exposed pipes for condensation, rust, or slow drips. Pay special attention to the sill plate—that's the wooden board where the house frame rests on the concrete foundation. Dark stains or dampness here are a huge red flag that water is getting in from outside.
Don't Forget Your Exterior Walls
Finally, take your investigation outdoors. Detecting water leaks in walls isn't just an inside job. A walk around the perimeter of your house can tell you a lot.
One of the most obvious signs is efflorescence. This is a chalky, white powder that forms on brick, stucco, or concrete. It happens when water soaks through the masonry, dissolves the natural salts inside, and then evaporates, leaving the salt deposits behind. It’s a dead giveaway that water is moving through your walls.
While you're out there, look up. Make sure your gutters are clear and the downspouts are channeling water far away from your foundation. If a gutter is clogged, water will just spill over the side and saturate the wall directly below it.
Using Leak Detection Tools Like a Pro
Once your own senses have tipped you off to a problem, the next step is to pinpoint the exact source—ideally without taking a sledgehammer to your wall. This is where modern leak detection tools come in, transforming what was once a stressful guessing game into a precise, evidence-based search.
While a professional plumber arrives with an entire arsenal of high-tech gear, a few user-friendly tools can give you a massive head start. The goal isn't to start a major demolition project. It's to gather enough solid evidence to know exactly where the trouble is, whether you're planning a small DIY patch or guiding a pro to the precise point of failure.
Mastering the Moisture Meter
For any DIYer serious about finding a leak, a moisture meter is your absolute best friend. It’s an affordable, non-invasive tool that tells you if and where your drywall is holding water. For checking painted walls, you’ll want a non-penetrating (or "pinless") model, as it won't leave any marks.
These meters work by sending out low-frequency electronic signals into the wall material. The sensor then measures how those signals are affected by moisture, giving you a relative reading of the moisture content. Think of it like a stud finder, but for water.
Here’s how we use them in the field to get reliable results:
- Get a Baseline: First, test a section of the wall you know is perfectly dry. This gives you a "normal" reading to compare against. Every home is different.
- Scan Systematically: Start near the visible damage and slowly glide the meter across the wall. Work in a grid pattern—up, down, and side to side—to cover the entire suspicious area.
- Map the Moisture: Keep an eye on the meter's display. The readings will climb as you get closer to the wettest area. A great pro tip is to use small pieces of painter's tape to mark the spots with the highest readings. This creates a visual map of the moisture spread, often leading you straight to the source.
A high moisture reading doesn't just confirm a leak; it outlines its footprint. You'll often find that the wettest spot is not where the visible stain is. Water can travel along studs or down insulation before it finally soaks through the drywall.
See Through Walls with Thermal Imaging
When a professional absolutely needs to find a leak with 100% certainty, we often break out the thermal imaging camera. These incredible devices don't actually see moisture. Instead, they see tiny temperature differences on a surface.
Since water—whether from a hot or cold pipe—changes the temperature of the drywall it soaks, a thermal camera makes these temperature anomalies pop. A cold water leak creates a distinct, cooler blue or purple signature on the screen. A hot water leak? It shows up as a bright red or yellow patch. By scanning a wall, a technician can instantly see the shape and location of hidden moisture.
Thermal imaging is a game-changer for:
- Finding leaks from pipes buried deep in walls or ceilings.
- Locating water intrusion around windows and doors.
- Detecting moisture spreading under flooring without tearing it up.
It’s an incredibly fast, non-destructive method that gives us immediate visual proof of a problem.
Leak detection tools range from simple and affordable to complex and expensive. Understanding which tool to use for which job is key to efficient and accurate diagnostics.
Comparing Leak Detection Tools
| Tool | How It Works | Best For | DIY-Friendly? | Typical Cost |
|---|---|---|---|---|
| Moisture Meter | Measures electrical resistance or capacitance to detect moisture content in materials. | Confirming the presence and spread of moisture in drywall, wood, and flooring. | Yes | $30 – $150 |
| Thermal Camera | Detects infrared energy (heat) to show temperature differences caused by hidden moisture. | Quickly scanning large areas for hidden leaks, especially hot/cold water pipes. | Moderately (Entry-level models available) | $200 – $5,000+ |
| Acoustic Detector | Uses a sensitive microphone and amplifier to listen for the specific sounds of drips or hisses. | Pinpointing pressurized leaks in pipes hidden behind walls or under concrete slabs. | No (Requires trained ear) | $1,000 – $7,000+ |
| Endoscopic Camera | A small camera on a flexible cable provides a live video feed from inside a wall cavity. | Visually confirming the source of a leak after its general location is known. | Yes (Affordable models exist) | $50 – $400 |
While DIY-friendly tools are great for initial investigation, professional-grade equipment like acoustic detectors provides a level of precision that's essential for complex or deeply hidden leaks.
Listening for Leaks with Acoustic Detectors
Sometimes, the best way to find a leak is to listen for it. Even the quietest drip from a pinhole leak in a pressurized pipe creates a sound, but it’s often far too faint for the human ear to catch through a thick wall. That’s where acoustic leak detectors come in.
These devices use a highly sensitive microphone paired with sound-amplifying headphones. A technician places the sensor against the wall and listens for the specific frequency of dripping or hissing water. Modern research highlights just how powerful this is; studies on acoustic emission methods show advanced sensors can pinpoint pinhole leaks as small as 0.2 mm with an accuracy up to 99.73%. You can explore more about these acoustic detection findings and their statistical accuracy in the published research.
Peeking Inside with an Endoscopic Camera
What if you’ve narrowed down the area but need to see the actual pipe to be sure? Before cutting a huge, messy hole in the wall, a pro will use an endoscopic camera, also called a borescope.
This tool is simple but brilliant: a tiny camera on the end of a long, flexible cable. We drill a tiny, easily patched hole and feed the camera into the wall cavity. The live video feed lets us visually inspect every pipe, stud, and bit of insulation to find the source of the water.
Using a borescope is often the final step in non-destructive diagnostics. It provides undeniable visual confirmation before any major demolition begins, saving you time, money, and a whole lot of cleanup. It helps avoid that nightmare scenario where a simple leak check turns into a massive, unnecessary repair job.
And before you even assume the leak is in the wall, it's smart to rule out simpler issues. Checking your water meter for unexplained activity is a great first step; you can learn all about it in our guide on how to read your water meter.
What to Do Immediately After Finding a Leak
That moment of discovery. You've confirmed there's a leak in the wall, and now the panic starts to creep in. Water is spreading behind the drywall, and you know every second is making things worse.
Before you do anything else, your absolute first priority is to stop the flow of water.
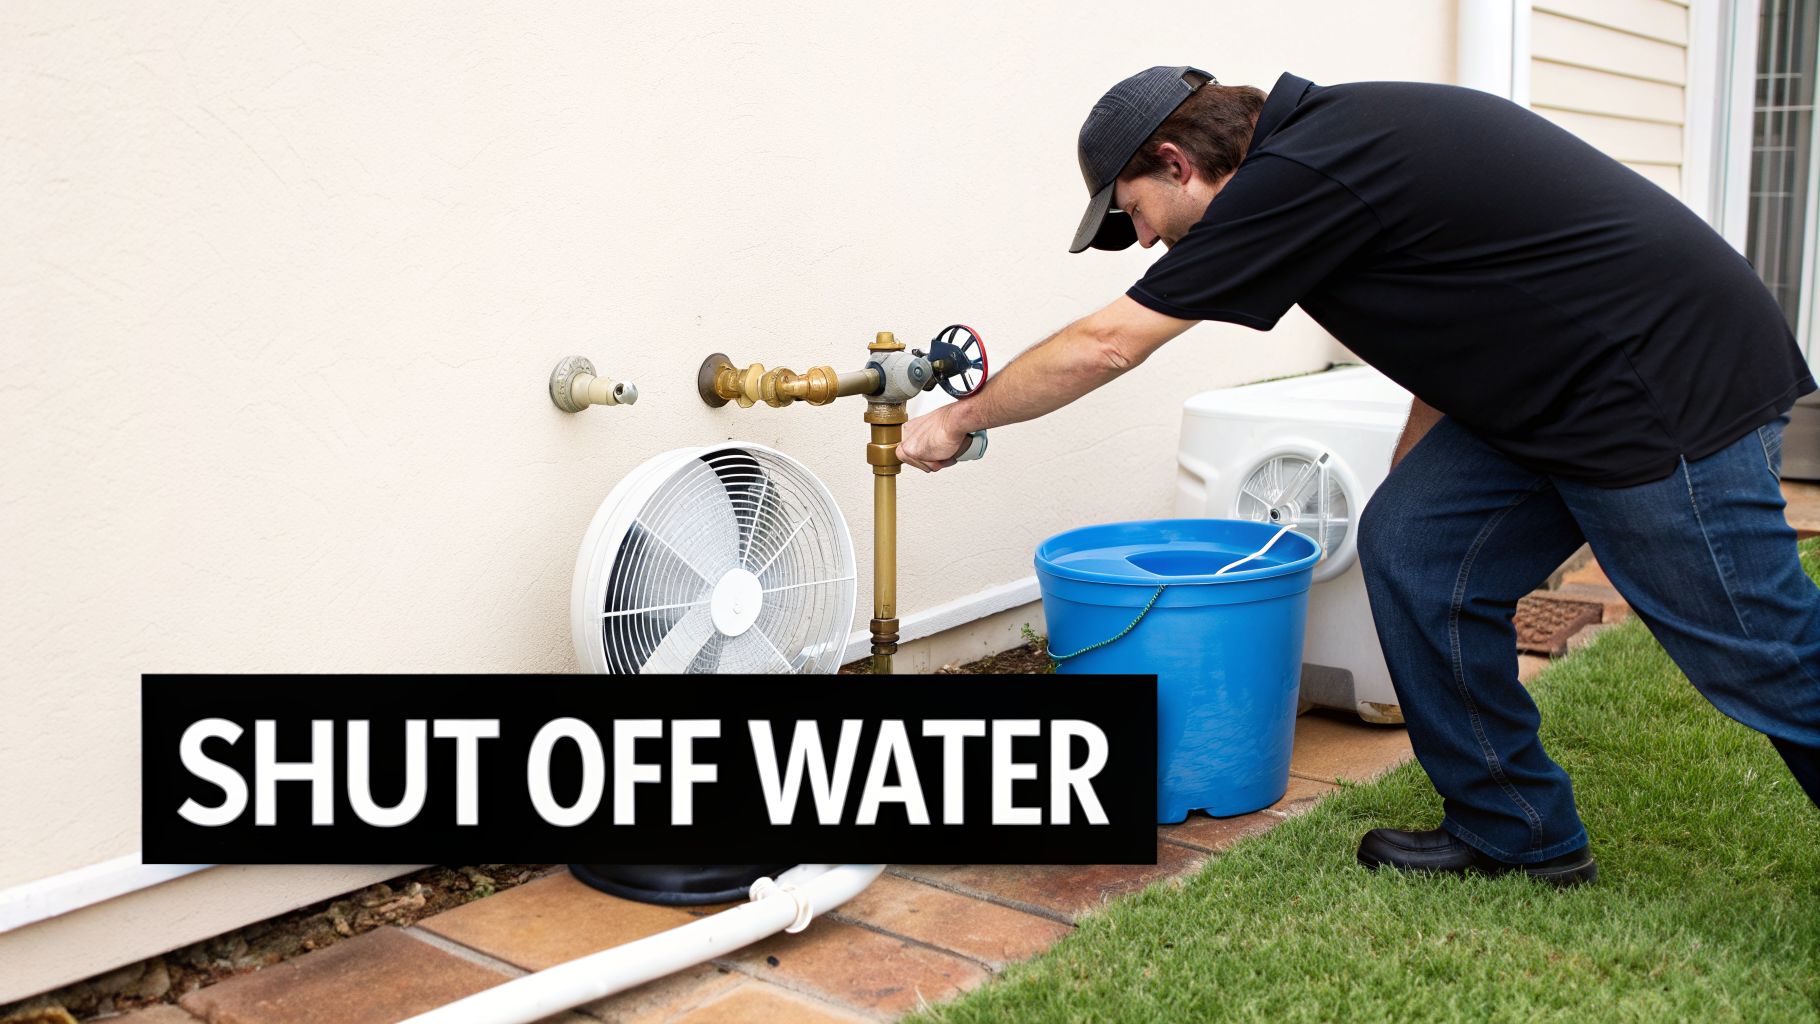
This means shutting off the main water supply to your entire house. Don't waste precious minutes fiddling with a smaller valve under a sink unless you're 100% certain it controls the leaking pipe. The only surefire way to halt the damage in its tracks is to turn off the main.
You’ll usually find the main shut-off valve where the primary water line enters your home. Check these common spots:
- Outside your house: Often on an exterior wall, close to your water meter.
- In a basement or crawl space: Look near the front foundation wall.
- In a utility closet or garage: It's frequently located near the water heater.
The valve will either be a gate valve (a round handle you turn clockwise like a spigot) or a ball valve (a lever handle you turn a quarter-turn until it's perpendicular to the pipe).
Begin Immediate Damage Control
With the water off, your focus needs to shift to managing the water that’s already escaped. The goal is to contain the mess and get the drying process started right away. In Miami's humid climate, even a small amount of water can lead to mold growth in just 24-48 hours.
Grab every towel, bucket, and mop you have. Start soaking up standing water and catching any remaining drips. If the drywall is soaked and sagging, place a bucket underneath and carefully puncture the lowest point with a screwdriver. This gives the trapped water a controlled escape route, preventing it from spreading further across the ceiling or down the wall.
Next, get the air moving. Point fans directly at the wet wall and floor. If you have a dehumidifier, now is the time to put it to work—place it in the room and crank it to its highest setting. Pulling that moisture out of the air and the building materials is your best defense against long-term structural issues and mold.
Safety First: Water and electricity are a deadly combination. Immediately unplug any and all electrical devices near the leak. Avoid using wall outlets on a damp wall, and never stand in water while operating any electrical appliance.
Document Everything for Your Records
Before you clean up completely, grab your phone and channel your inner crime scene investigator. This step is absolutely critical for any potential insurance claim.
- Take wide shots: Get photos of the entire room to show the full scope of the leak.
- Get close-ups: Take detailed pictures of the water stain, any damaged drywall, and visible drips.
- Record a video: A short video showing the active drip (if it was still going) and explaining what you found can be powerful evidence.
Insurance policies often draw a line between "sudden and accidental" damage (which is usually covered) and problems from long-term neglect. Detailed, time-stamped proof can be your strongest asset when filing a claim. If you're struggling to figure out exactly where the water is coming from, our guide on what to do if you suspect a leak but can't find it has more tips.
Once you’ve taken these first-aid steps, you've successfully minimized the immediate damage. The situation is under control, which buys you valuable time to move on to the next phase: getting a professional diagnosis to plan a permanent fix.
When to Call a Professional Leak Detection Service

Knowing your limits is probably the most important part of dealing with a hidden wall leak. A good DIY inspection is a fantastic first step—it's empowering and helps you get a handle on the situation. But there are definitely moments when the smartest move you can make is to put down the moisture meter and pick up the phone.
Calling in a professional isn't giving up. It's a strategic move to protect your home and your wallet from what could become a much bigger headache. Your goal is to confirm there's a problem; a pro’s job is to find the source without causing a catastrophe.
Signs It’s Time to Call a Professional
Think of it this way: your job is to spot the smoke, while an expert's job is to find the fire without tearing your house apart. Certain scenarios are clear signals that professional help isn't just a good idea—it's necessary for a safe and effective fix.
You should bring in the pros when:
- You See the Damage But Can't Find the Source: You've found a water stain, the paint is bubbling, and your moisture meter is beeping like crazy. But you still have no clue where the water is actually coming from. A professional can trace it back to its origin.
- You Suspect a Slab Leak: If you’re noticing strange warm spots on the floor, hearing the sound of running water when everything is turned off, or seeing new cracks in your foundation, the leak might be under the concrete slab. This is absolutely not a DIY situation.
- The Problem Seems Widespread or Complex: You’re finding moisture in multiple spots that aren’t connected. This could point to several different leaks, a complex plumbing issue, or water traveling in very strange ways behind the scenes.
- The Water Meter Test Fails: You’ve shut off every single faucet, toilet, and appliance in the house, but the little dial on your water meter is still spinning. This is a sure sign of a leak somewhere in your system, and a professional can isolate it.
One of the most expensive mistakes we see homeowners make is what we call "exploratory demolition"—cutting into walls based on a hunch. A professional service uses advanced tools to pinpoint the leak, allowing for a surgical repair that minimizes damage and follow-up costs.
The Value of Professional Diagnostic Tools
When you contact a team like Coral Plumbing and Air, you aren't just hiring a person with a wrench. You're getting access to a whole suite of advanced diagnostic equipment that removes all the guesswork.
As we touched on earlier, tools like thermal imaging cameras are game-changers. A technician can scan an entire wall in just a few minutes, instantly spotting the distinct cold signature of hidden water. It's incredibly fast, efficient, and completely non-invasive.
For pressurized pipes, acoustic leak detectors are used to "listen" for that tell-tale hiss or drip inside a wall. A trained ear can easily distinguish the unique sound of a leak from other household noises, guiding them to the exact point of failure. If we need to see it with our own eyes, we can drill a tiny hole and insert an endoscopic camera to get a direct view inside the wall cavity, confirming the problem before making any large cuts.
This level of precision saves you money in three key ways:
- It drastically reduces the amount of demolition needed.
- It shortens the time it takes to both diagnose and repair the leak.
- It ensures the right pipe gets fixed the very first time.
The Risks of DIY Repairs and Building Codes
Even if you manage to find the leak on your own, the repair itself is a whole other beast. Fixing a pipe inside a wall isn't like changing a faucet washer. It often involves cutting, soldering, or crimping pipes, which all require specialized tools and, more importantly, experience. A poorly done repair can fail spectacularly, causing a flood that’s far worse than the original slow drip.
On top of that, any plumbing work must follow local building codes. In Miami-Dade, these regulations are strict for good reason—they ensure public health and safety. An improper repair could not only fail but also create major problems when you try to sell your home down the road. For a licensed professional, navigating permits and code compliance is just part of the job.
When you’re staring at a wall and wondering where to even begin, calling a professional is the fastest, most reliable path to a real solution. To see how we tackle these issues, you can learn more about our professional leak repair and detection methods.
Your Top Questions About Wall Leaks, Answered
When you think you have a leak, it’s normal for a flood of questions to follow right behind the water. That uncertainty can be just as stressful as the damage itself. Here are some clear, direct answers to the most common questions we hear from homeowners trying to figure out a wall leak and what to do next.
How Much Does Professional Leak Detection Cost?
The cost for a pro to find your leak can vary quite a bit, mostly depending on how hard it is to get to. If it's a straightforward issue that’s easy to access, you'll likely be on the lower end of the price range. But if the leak is buried under a concrete slab or hidden deep inside a wall, we’ll need to bring out advanced tools like thermal cameras or acoustic listeners. Pinpointing it that way naturally costs more.
A reputable company will always give you flat-rate pricing upfront, before any work starts. No surprise bills. Think of it as an investment, not just an expense. Paying for precision diagnostics almost always saves you a lot of money in the long run by preventing destructive guesswork and making sure the final repair is done right the first time.
Will My Homeowner's Insurance Cover Wall Leak Damage?
This is the big question, and the answer almost always comes down to where the leak came from. Most standard homeowner's insurance policies are designed to cover damage from a "sudden and accidental" event. A pipe that bursts inside a wall out of nowhere is a perfect example of this.
On the other hand, slow leaks that have been developing for months or years—maybe from a corroded pipe or bad sealant—are often not covered. The insurance company might argue that the damage could have been prevented with regular maintenance.
This is why it’s absolutely critical to document everything immediately and call your insurance provider as soon as you find the leak. A professional plumber’s detailed report, packed with photos and diagnostic findings, will be your strongest asset in getting your claim approved.
Can a Small Wall Leak Really Cause That Much Damage?
Absolutely. It’s one of the most dangerous myths in home maintenance. That tiny, persistent drip can be incredibly destructive. Water is relentless.
Slowly but surely, that quiet leak will saturate your drywall until it’s soft and crumbles. From there, it moves on to the wooden studs that frame your house, leading to wood rot that can compromise your home’s structural integrity.
Even more alarming, that dark, damp space is the perfect breeding ground for mold. In a humid climate like ours, mold can start growing in as little as 24 to 48 hours. What started as a tiny drip can quickly snowball into a major structural and health problem. No matter how small the leak seems, immediate action is crucial.
How Do You Fix a Pipe Inside a Wall Without Tearing It All Down?
The thought of fixing a pipe in a wall usually brings up images of sledgehammers and giant holes, but the reality is much more precise and clean these days. We avoid all that destructive guesswork by using the advanced tools we’ve talked about.
- Pinpoint Diagnosis: First, we use thermal imaging or acoustic detectors to find the exact point of failure. No guessing.
- Surgical Access: Instead of knocking down the whole wall, we make the smallest possible opening in the drywall—usually just a neat little square—directly over the damaged pipe.
- The Repair: Through that small access point, our plumber can cut out the bad section and replace it, whether that means soldering a new piece of copper pipe or using modern crimp fittings.
- Testing and Restoration: Once the repair is done, we pressurize the line and check it carefully to make sure the leak is 100% gone. After that, the small drywall patch can be replaced, taped, textured, and painted to blend in seamlessly.
This targeted approach prevents the massive disruption and expense of a full-scale demolition, turning a potential disaster into a clean, manageable repair.
When you're dealing with the stress of a hidden leak, you need a team that delivers fast answers and real solutions. For expert diagnostics and guaranteed repairs in the Miami area, trust Coral Plumbing and Air. Our certified technicians use the latest technology to find leaks with precision, saving you time, money, and headaches. Don’t let a small leak become a huge problem—contact us today for prompt, reliable service.
Created with the Outrank app